And the oldest item found in my pantry is:

A box of alphabet pasta (most likely purchased at Big Lots!) that expired in 2009.
Up too early due to the time change combined with an article in the Seattle times conspired to motivate me to see if I really could reorganize my pantry in the time in took the rest of my family to watch the latest episode of the Clone Wars.

I have these weird small shelves that swing out. They end up just being a repository for items that don’t fit anywhere else.

Some general arrangement, but way too haphazard.

Enough of the “before” pictures….. onto the AFTER!
From the Seattle Times article: Start with a clean slate
Begin by pulling everything out of the pantry and placing it all on the table or counter. As you work, glance at expiration dates and toss anything past its prime. Make a donation pile for unopened items you won’t realistically use or don’t want (such as random food gifts or baby food you no longer need). Once the pantry is completely cleared out, quickly wipe down shelves with a damp rag.
Total time: 10 minutes.
(IT REALLY DID ONLY TAKE ABOUT 10 MIN!)
Create zones
Rather than organizing items by container shape or size, group them by category to create easy-to-navigate zones. Using this approach, all breakfast foods (such as oatmeal, cereal, peanut butter, syrup, bread and bagels) are placed together on a shelf, as are snacks, pastas and grains, baking goods and canned goods. Do this as you’re emptying the pantry to give you a better idea of how much space you’ll need for each zone and to save time as you put things away in their new homes.
To keep shelves as tidy as possible, place products like cereals, pastas and grains in clear, airtight containers, preferably of the same shape to utilize space. This will prevent all those half empty boxes and bulk bags from piling up and allow you to easily see when your stock is getting low. Use baskets to corral individually wrapped items that are in the same zone, such as granola bars, fruit leather and applesauce cups (creating a snack basket for kids).
Remember to place the categories you most frequently use around shoulder level for easiest access. Items you rarely use or appliances that are stored in the pantry can be placed on the top or bottom shelf.
Total time: 30 minutes.

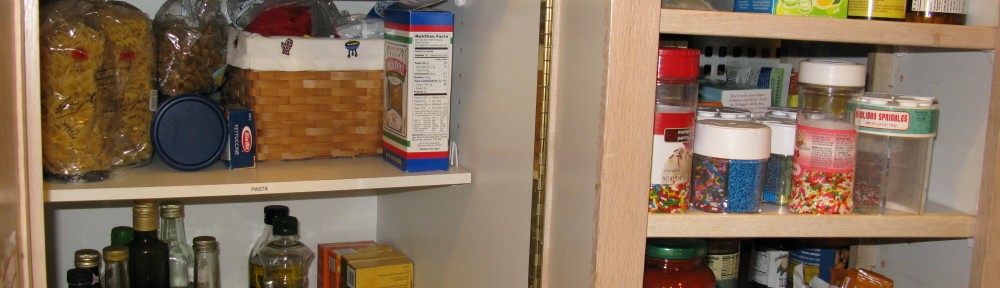
Yes, we do really have an entire shelf dedicated to sprinkles. Don’t get me started…

Categories created: Breakfast, Grains, Pasta, Canned Goods, Snacks, Treats.

Cleaning it all out resulted in a lot more open space. Good thing, since I’m starting the shopping for Thanksgiving.
Label shelves
Once everything has found a home, print labels and place them on the front of each shelf. This is essential to keeping your pantry organized longer. (Other family members are more likely to put the cereal back on the correct shelf if it’s labeled as such. Make it easy for them and protect your hard work.)
Total time: 5 minutes.
My fourth-grader loved using the P-Touch to label shelves. NOTE TO SELF- check kid’s spelling BEFORE letting him apply the labels to shelves.
Now to summon the nerve to tackle the cupboards where I store my baking supplies….