 Rule # 1
 Nobody talks about Fight Club Establish what you’re drinking. In this case, it was Mint, Cucumber and Vodka cocktails. Had to love the look on the checkout guy’s face at the local Fred Meyer when three sweaty women (thank you, muscle toning class) roll up a cart filled with produce, canning jars and a bottle of triple sec.
Rule # 2 Figure out all of the math before you start drinking. Canning is a lot of math (and science). Why I love it, I really have no idea.
Rule # 3 Canning is always more fun with friends and, despite the drinking, more efficient.
Rennie & I have been canning quite a bit this summer and a conversation on facebook inspired another friend, Monique, to join us. She quickly admitted no prior experience but that was no problem, she could peel 10lbs of carrots just fine. Without the pressure of feeding a family throughout the winter, canning can be a lot of fun, especially if you divvy up the jobs, mix drinks and crank up the music.
Today’s canning project was inspired by a book I read years ago, Blue Jelly. Somewhere between Los Angeles and Fresno (in the armpit of Southern California, probably Bakersfield) I stopped with my then-boss at an outlet mall and in a discount bookstore picked up a small book on getting over a broken heart through canning. My boss looked at me like I was crazy (nothing new) when he read the back but I bought it anyway and have been thinking about the Mexican relish ever since. Funny how things stick with you. Searching online for the recipe to send to Rennie, I came across this blog and she had written up what I had already been thinking.
Canning is best done with someone that’s done it before. It moves really fast and you can always use an extra set of hands, especially when the other set of hands is far better than you at packing the jars and making them look nice. Here we go….
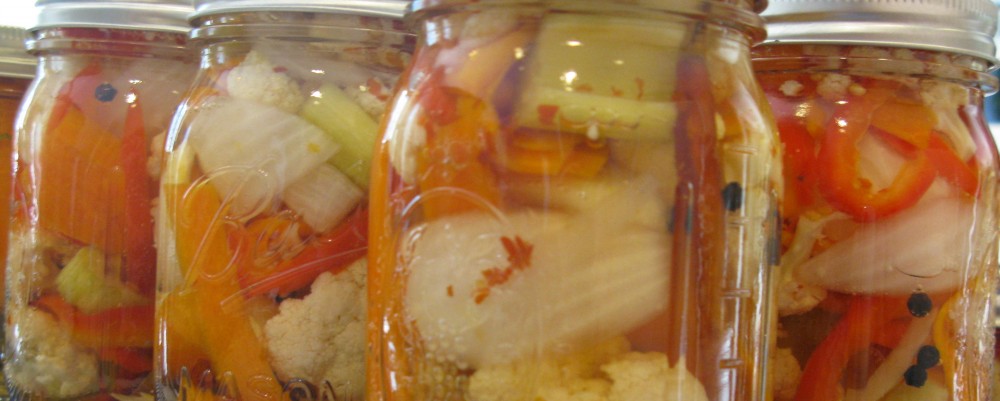
SPICY MEXICAN RELISH by Debby Bull
- pint jars (my batch made 6 pints)
- 1 cauliflower, broken into florets
- 1 red sweet pepper, cut into strips
- 2 or 3 c. baby carrots, or sliced adult carrots (I used 2 cups and used my mandolin to cut them really thin).
- 2 c. celery, cut into 1 inch slices
- 2 c. small whole onions, or 2 medium onions, quartered (I used the medium onions)
- pickling salt (do not use table salt)
Pickling Solution:
- 5 c. distilled white vinegar, 5% acidity
- 1 c. water
- 1/2 c. sugar
For Packing in Jars:
- garlic cloves, peeled (I used 1 per jar)
- chile peppers, dried or fresh (I used 1 dried red chili and 1/4 teaspoon red pepper flakes per jar)
Put all the cut up vegetables into a large glass, stainless, or stoneware bowl and cover with cold water and 1/4 c. pickling salt. Dissolve the salt in a little hot water before adding it to the water poured over the veggies. Cover the bowl with a plate or another bowl that presses down on the veggies to keep them submerged. Let it sit for at least one hour.

Wash the jars in hot soapy water or run through the dishwasher, keeping them warm until ready for use. Have a large pot of water (preferably a canning pot with a rack to lift the jars in/out) simmering on the stove (I keep my jars in the canning pot until ready to fill). Lids (new lids, every time) and bands (OK to reuse bands) are also on the stove in a little saucepan simmering in hot water. The hot water softens the rubber gaskets so help the jars seal correctly during processing.
In a large pot, combine the pickling solution and simmer for 15 minutes. Keep the lid on to keep it from both evaporating and irritating your eyes. It’s strong.
Pack the jars with a garlic clove and your desired amount of heat. Cram as many veggies in as you can without breaking the jars or extending over the top. They’ll shrink during the processing and you don’t want half-empty jars. Fill with the boiling pickling solution, leaving 1/4 inch headspace. Wipe the jar rims with a clean cloth and place the lid and band, tightening to fingertip tight. Don’t wrench the lid on, the jars expand and contract during the processing.
When all jars are packed, place into the simmering pot and bring to a full rolling boil. Keep in the boiling water for 15 minutes (use a timer as you will probably have a good buzz at this point). Remove the jars and cool on a rack or a towel on the counter. Do not place hot jars on a cold tile counter. Leave alone for 24 hours, then check lid. It should NOT flex up/down. If it does, reprocess the jar. Otherwise, tighten the bands and store jars in a cool dark place for 6 weeks. I may end up ultimately adjusting the amount of heat in the ones I recently made and I am counting the weeks until I can open my jars.
